Host guide
Run your event with Bosco.
Everything you need to know as the host: setting up your event, getting guests to join, the day itself, and turning everyone's photos into prints, a photo book or cards.
The short version
Five steps.
- 01
Create your event
In the Bosco app or on the web. Pick the day and pay the $49 reservation fee, one for each day.
- 02
Invite guests early
Send the invite or put table cards out.
- 03
Enjoy the day
The event starts by itself at midnight. Every photo your guests take comes to you.
- 04
Make something
After the event, design prints, a photo book or cards on the web.
- 05
Order and share
Order for yourself, and share your book or cards so guests can order their own.
Before the event
Create your event.
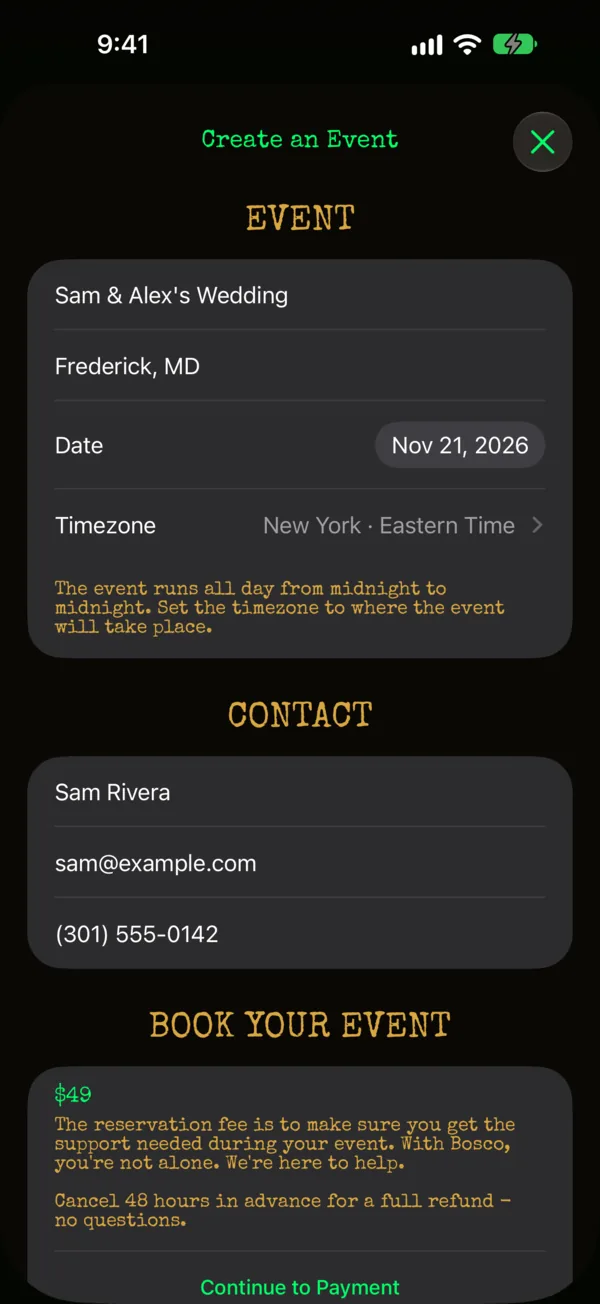
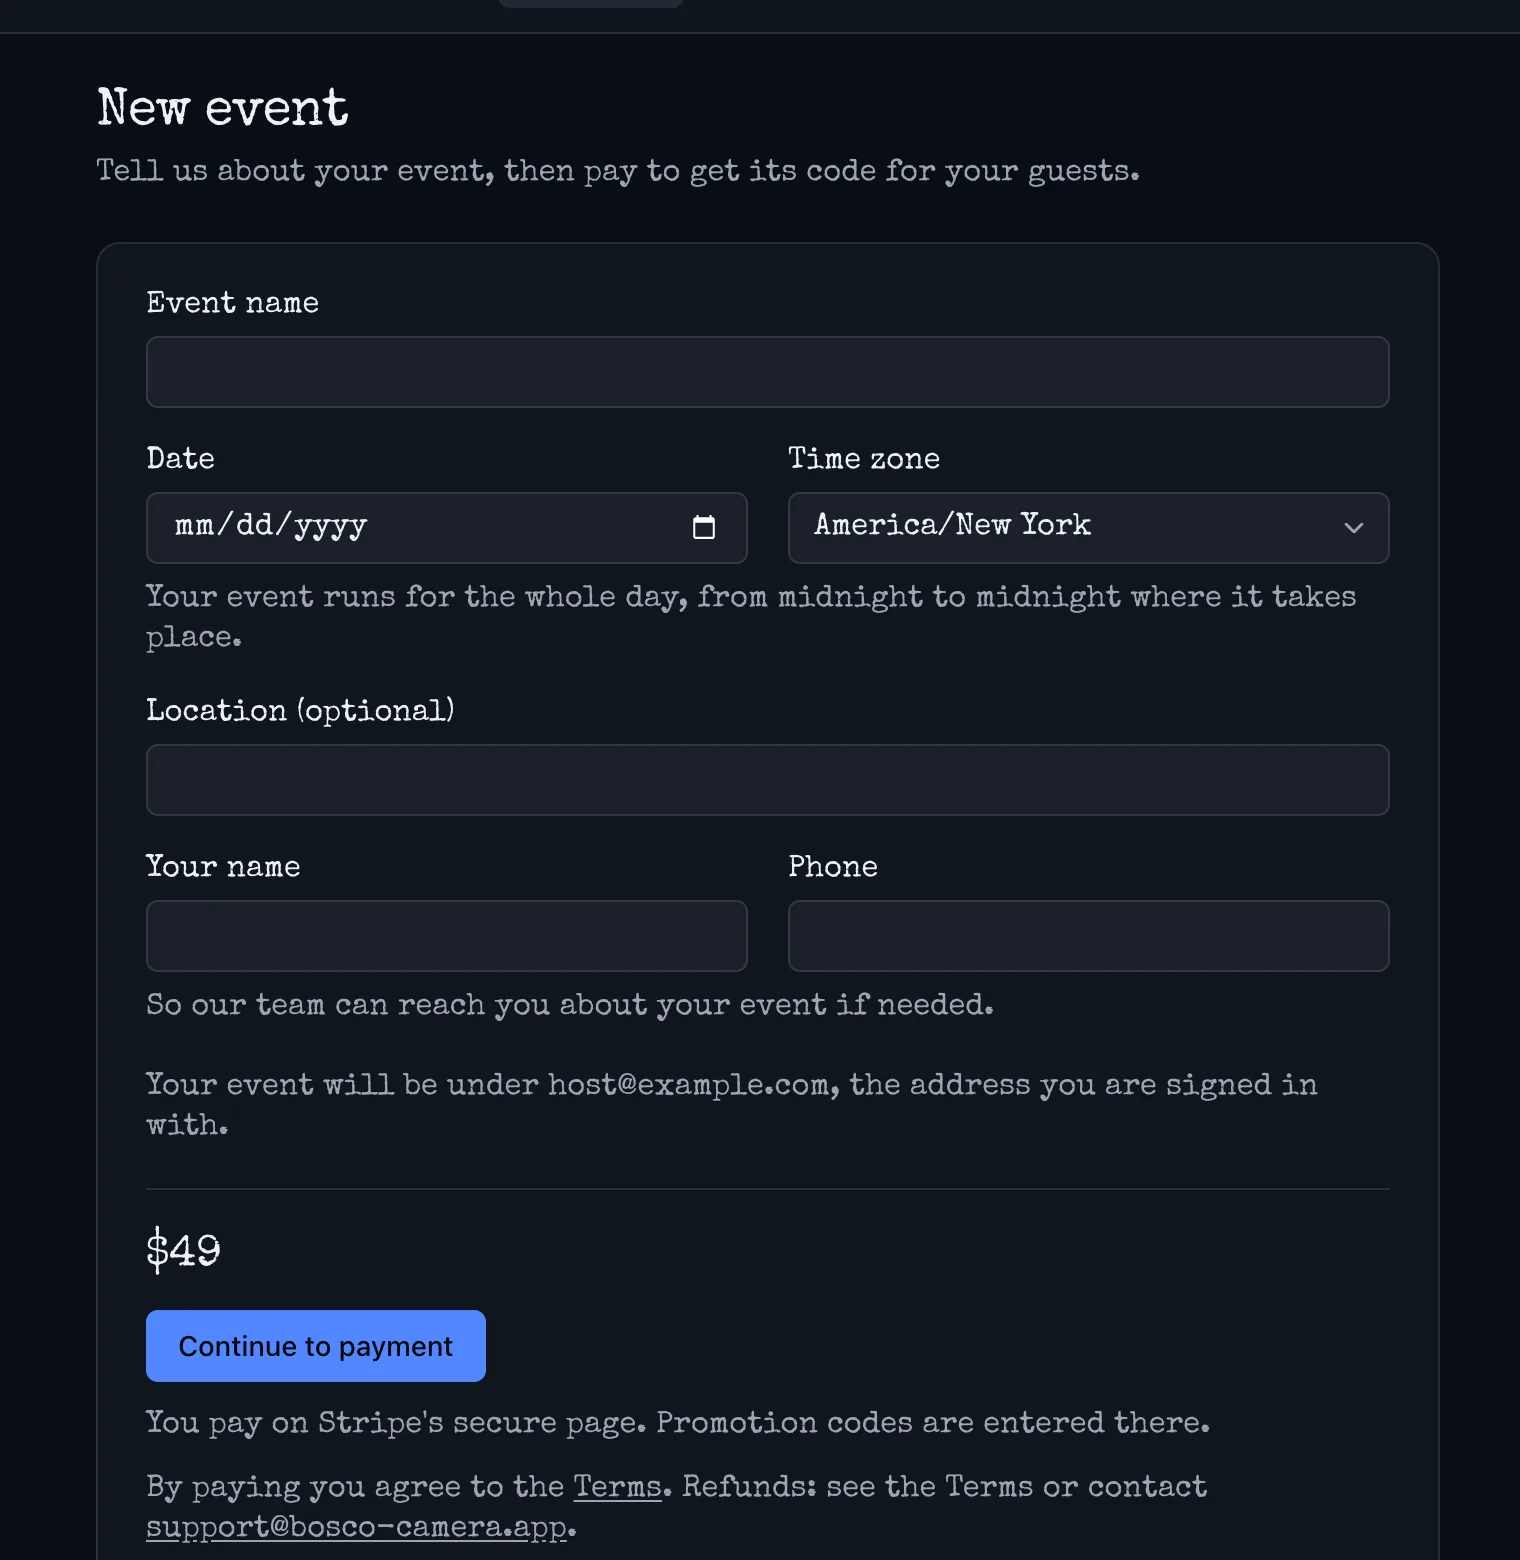
You can create an event in the Bosco app on your iPhone, or on the web at bosco-camera.app/organizer.
- In the app: on the camera screen, tap EVENT, then Create an Event.
- On the web: sign in with your email address, then choose New event.
You'll give the event a name (up to 22 characters, since it's shown on the camera), its date, its time zone, and optionally where it is. Add your name, email and phone, so our team can reach you about your event if needed.
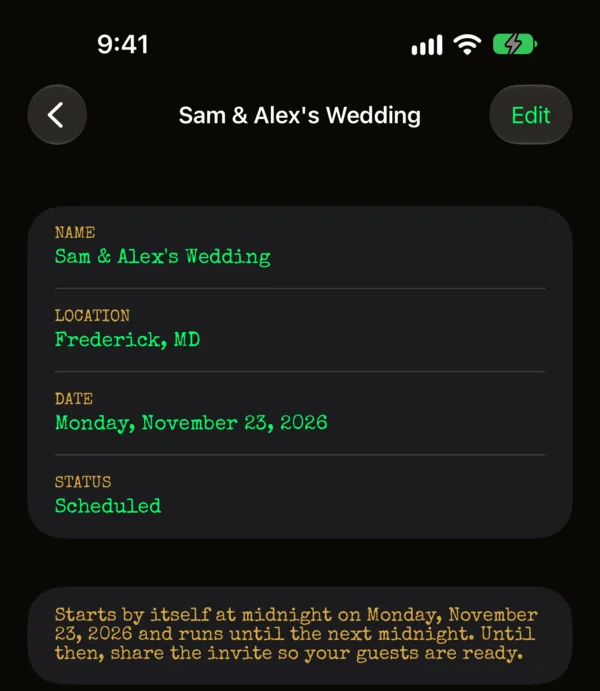
Your event lasts the whole day, from midnight to midnight in the event's time zone. Nobody has to press start: it begins and ends on its own.
Then pay the $49 reservation fee on Stripe's secure page. If you have a promotion code, enter it there. The fee pays for our team to support you during your event and to watch for photos that aren't allowed. You can cancel for a full refund, no questions asked, by emailing support@bosco-camera.app at least 48 hours before your event's day begins.
Once you've paid, we email you "Your Bosco event is ready". Keep it: it has the link to the web pages where you'll see everyone's photos later.
More than one day? Each event covers one day. For a wedding weekend, or anything that runs over several days, reserve each day as its own event, at $49 a day. The fee pays for a real person on our team to support you that day.
You can change the event's name, place and contact details later in the app with Edit. The date and time zone can be changed until the event starts.
Before the event
Invite your guests.
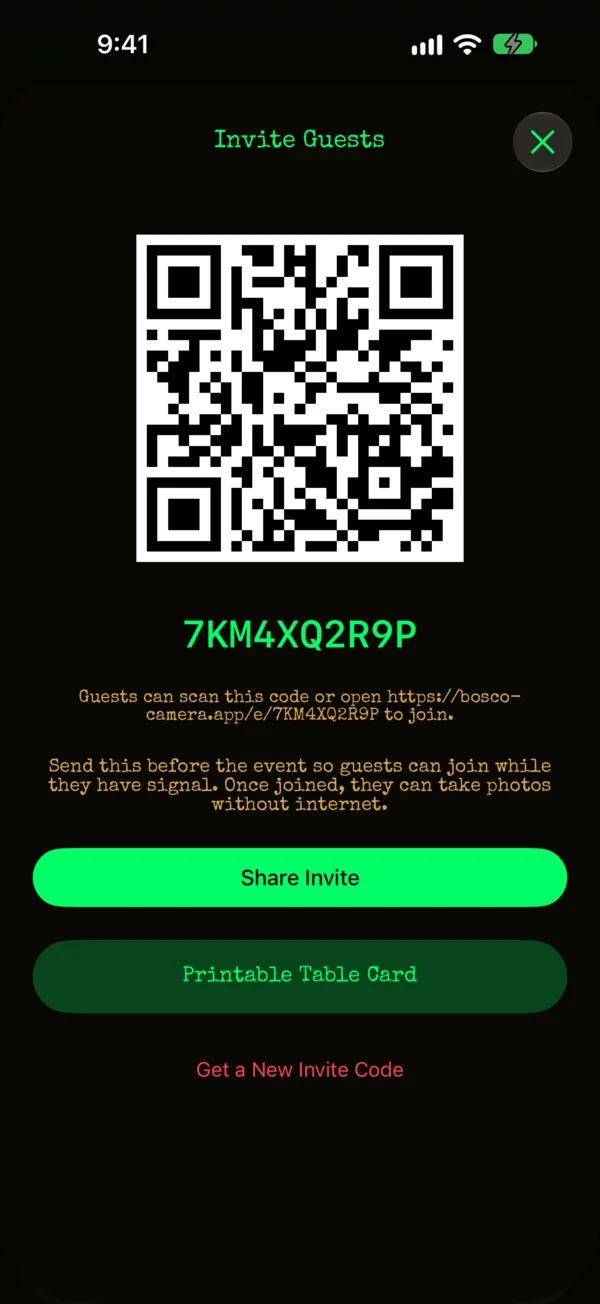
Every event has a guest code, ten letters and numbers, and a QR code that opens it. Guests need the free Bosco app on an iPhone to join.
In the app, open your event and tap Share Invite. From there you can:
- Share Invite: send the link by text, email, or anywhere else.
- Printable Table Card: a 4×6 or 5×7 card with the QR code, the guest code and three simple steps. Share it as a PDF or print it.
- Get a New Invite Code: if a code gets passed around. The old code and any printed cards stop working, and guests who already joined aren't affected.
Invite before the day. Joining needs the internet, but taking photos doesn't. Guests who join ahead of time can shoot all day, even at a venue with no signal. If you do use table cards at the venue, tell guests the Wi-Fi.
Who can join
On your event's screen in the app, Who Can Join shows how many guests have joined. Turn off Allow new guests to stop anyone new from joining, or turn on Guest limit to cap the number. Guests who already joined can keep taking photos either way.
Co-organizers
Want help running the event? In the app, under Organizers, tap Invite a Co-organizer and share the code with someone you trust. Co-organizers can see and order every guest's photos, edit the event, end it, change who can join and remove guests. Only you can manage co-organizers, change the contact details, and design products on the web.
If you made your event on the web
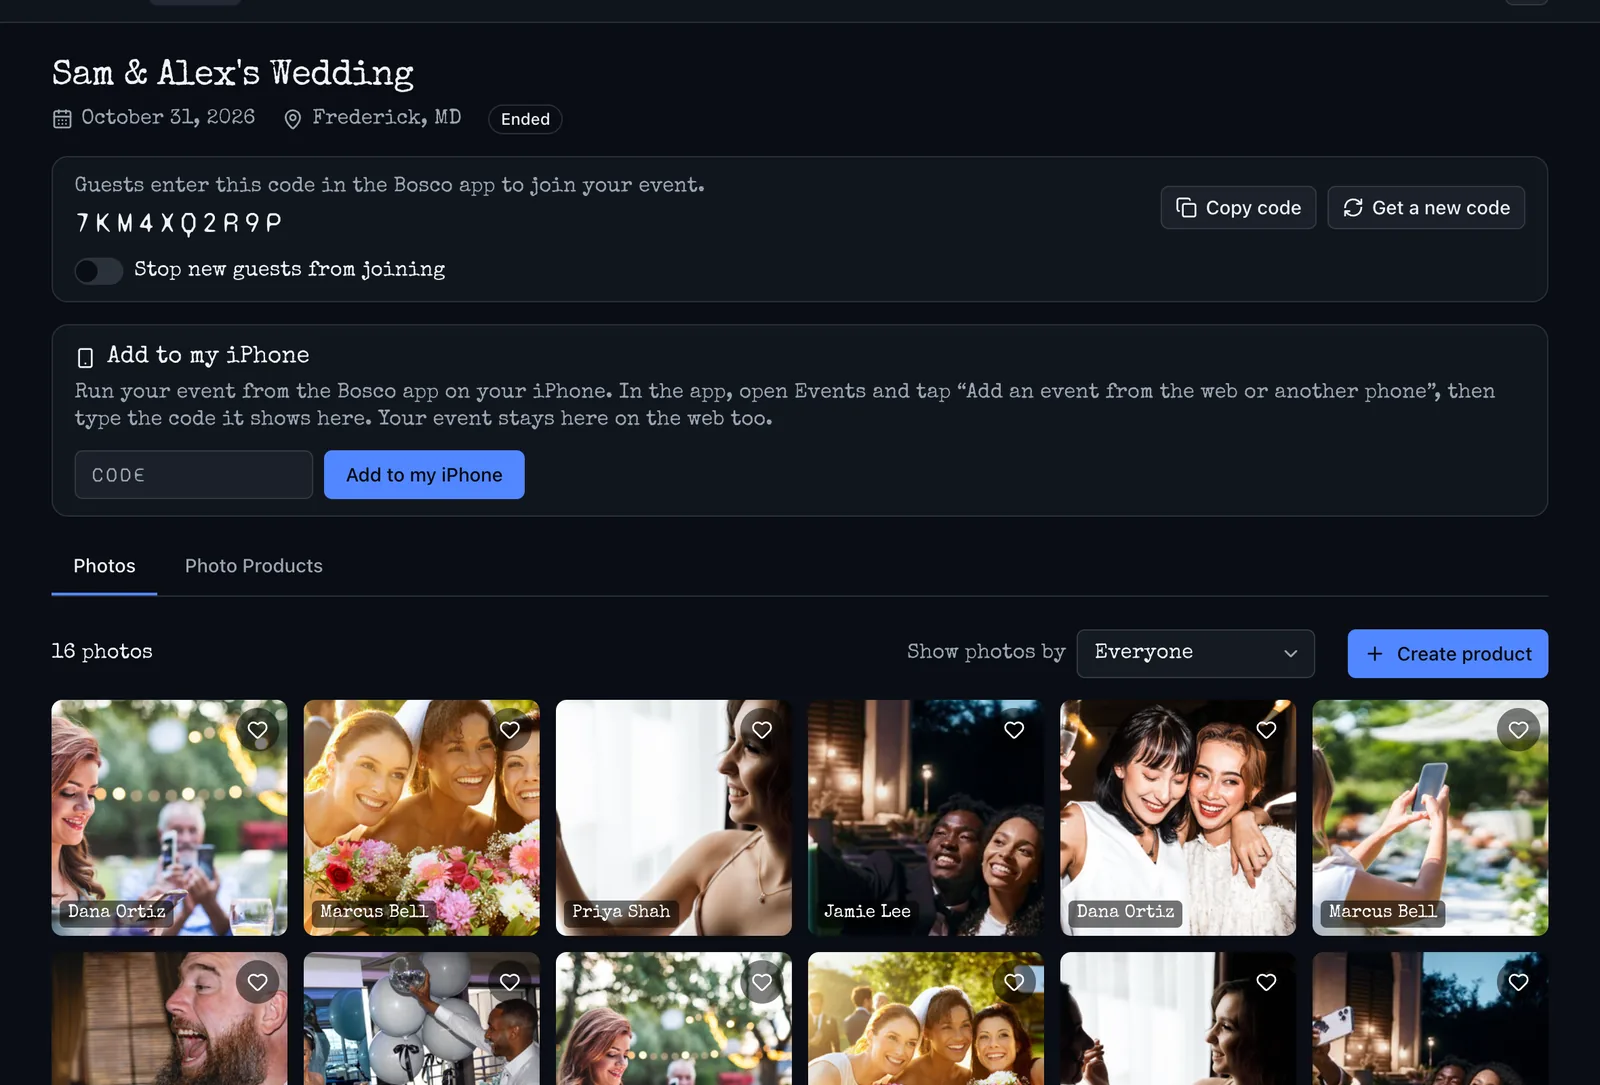
The guest code is at the top of your event's page. Use Copy code to send it, Get a new code to replace it, and Stop new guests from joining to close the door.
To run the event from your iPhone instead, use Add to my iPhone: in the app, open Events and tap Add an event from the web or another phone, then type the code it shows into the web page. Your event stays on the web too, and the QR code and table cards are then in the app.
For your guests
What your guests do.
- Get the free Bosco app from the App Store.
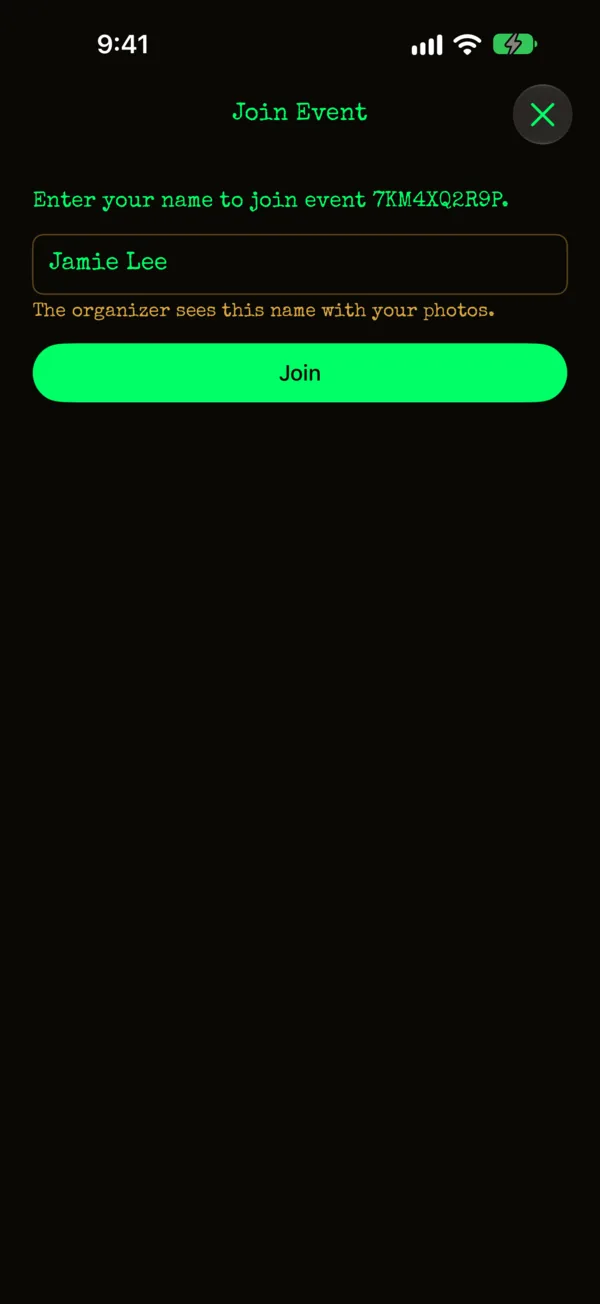
- Scan your QR code or open your invite link, or type the guest code under Join an Event.
- Enter their name. You'll see it next to their photos.
- Agree to how event photos are shared, then start shooting.
Each guest can take up to 240 photos, in rolls of 24. Photos upload by themselves whenever the phone is online, so a guest with no signal at the venue can keep shooting and their photos arrive later.
Guests only see their own photos. They don't see each other's, unless you share a product with them. Then they see it as a watermarked preview and can order their own copy.
On the day
Enjoy your event.
Your event goes Live at midnight on its day and ends at the next midnight. While it's live, your event's screen in the app shows the time remaining, and you can tap Take Photos to shoot for the event yourself.
Open Proof Sheet to watch photos come in, one strip per guest. It shows how many photos have arrived and how many are still on guests' phones.
- Remove a guest's photos: if someone's photos shouldn't be there, use Remove this guest's photos on their strip. All their photos leave your event and they can't upload more. This can't be undone.
- End the event early: tap End Event. Guests' cameras stop for the event the next time their phone is online. This can't be undone.
- Need help? Tap Get help with this event to email our team. We're watching while your event runs.
After the event ends, guests have 48 hours for photos still on their phones to upload. Your event's screen shows Photos arrive until with the time.
After the event
See everyone's photos.
The best place to see your photos is the web, on a computer or tablet. Go to bosco-camera.app/organizer, enter the email address on your event, and open the sign-in link we send you. The link works once, for 30 minutes, and you stay signed in for a day.
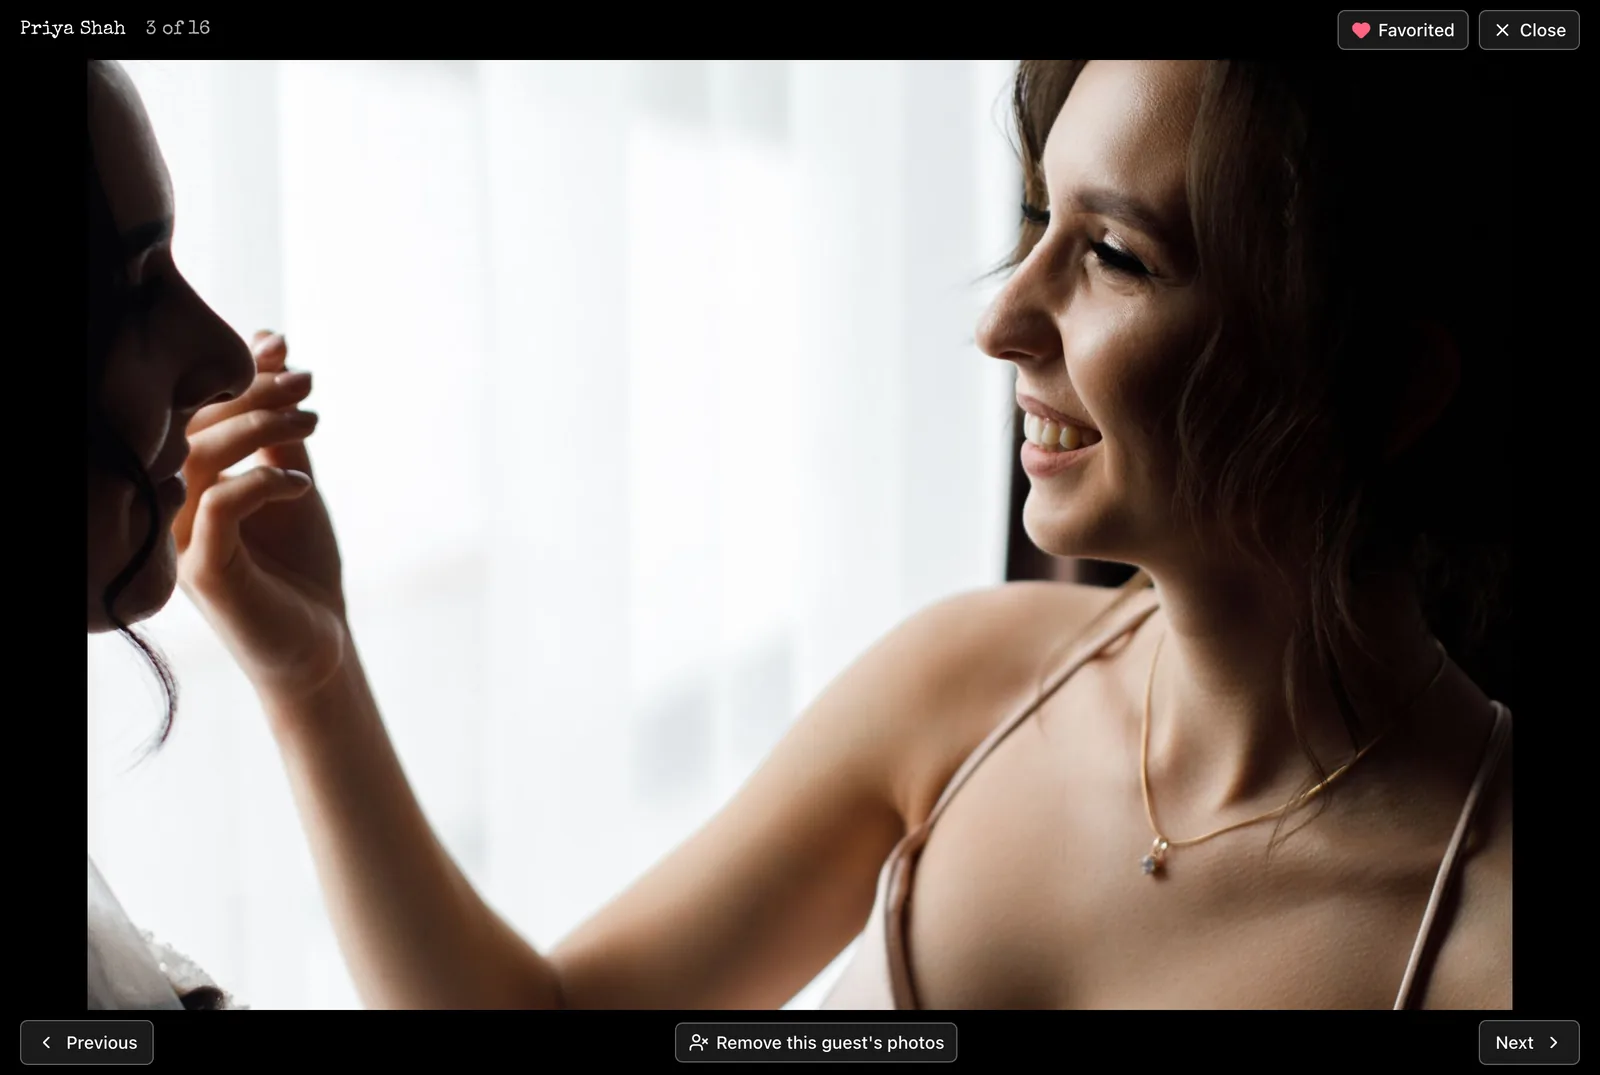
- Photos shows every photo, with the name of the guest who took it. Use Show photos by to see one guest's photos.
- Tap the heart on a photo to add it to Favorite Photos. Favorites make it quick to pick photos for a product later.
- Click a photo to see it large, and use Previous and Next (or the arrow keys) to flip through.
- You can remove a guest's photos here too, with Remove this guest's photos.
After the event
Make prints, books and cards.
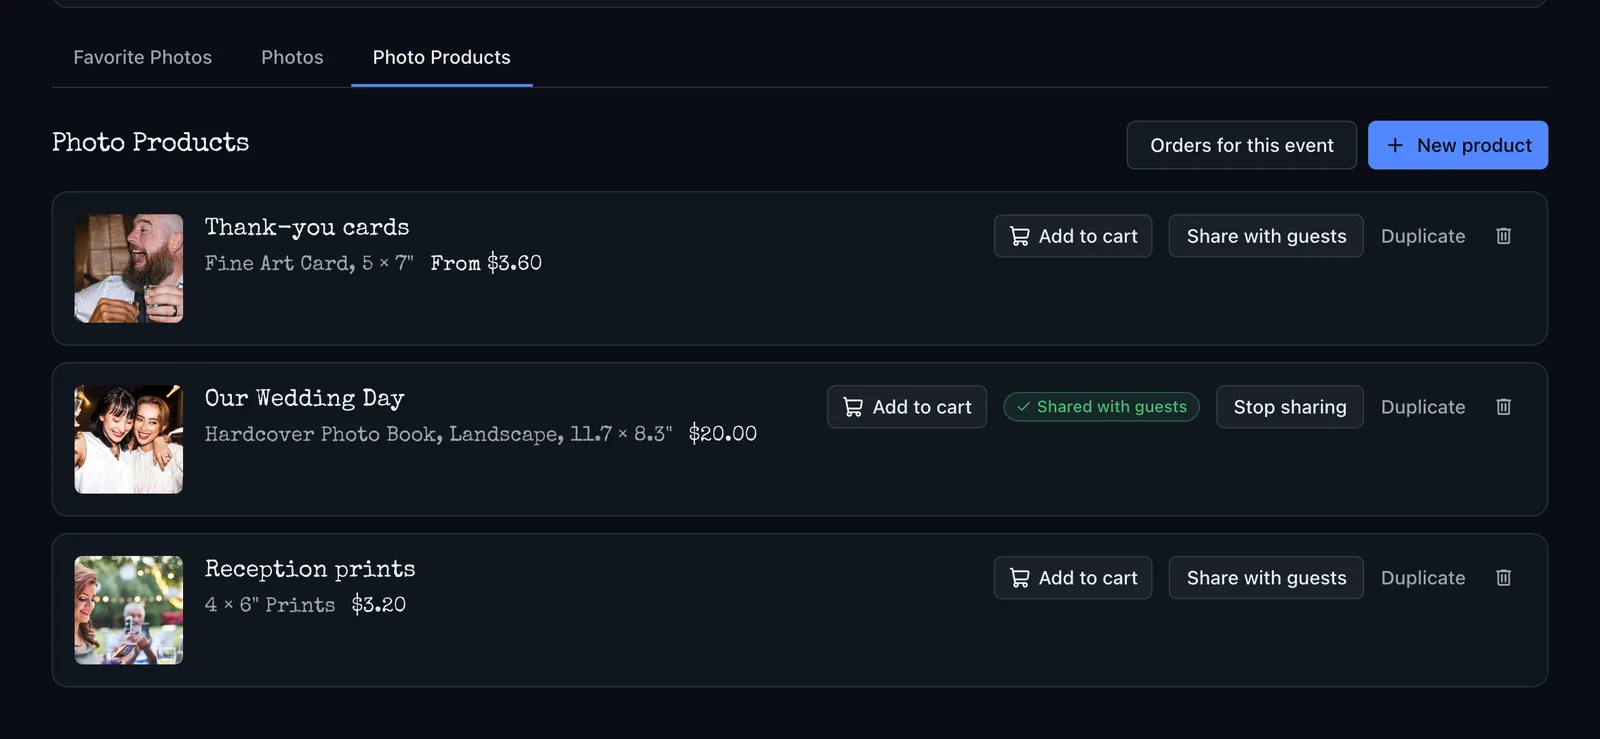
On your event's page on the web, open Photo Products and choose New product. Or select photos in Photos and choose Create product. You can make as many products as you like, and everything you make is saved as you go.
Prints
Choose a size (3.5×5, 4×4, 4×6, 5×5 or 6×6) and pick photos. Each photo prints once to start with; use + and − to order up to 20 copies of one. Prints are on real photo paper with a lustre finish.
Prints can also be ordered from the app: after the event ends, open your event and tap Order Prints.
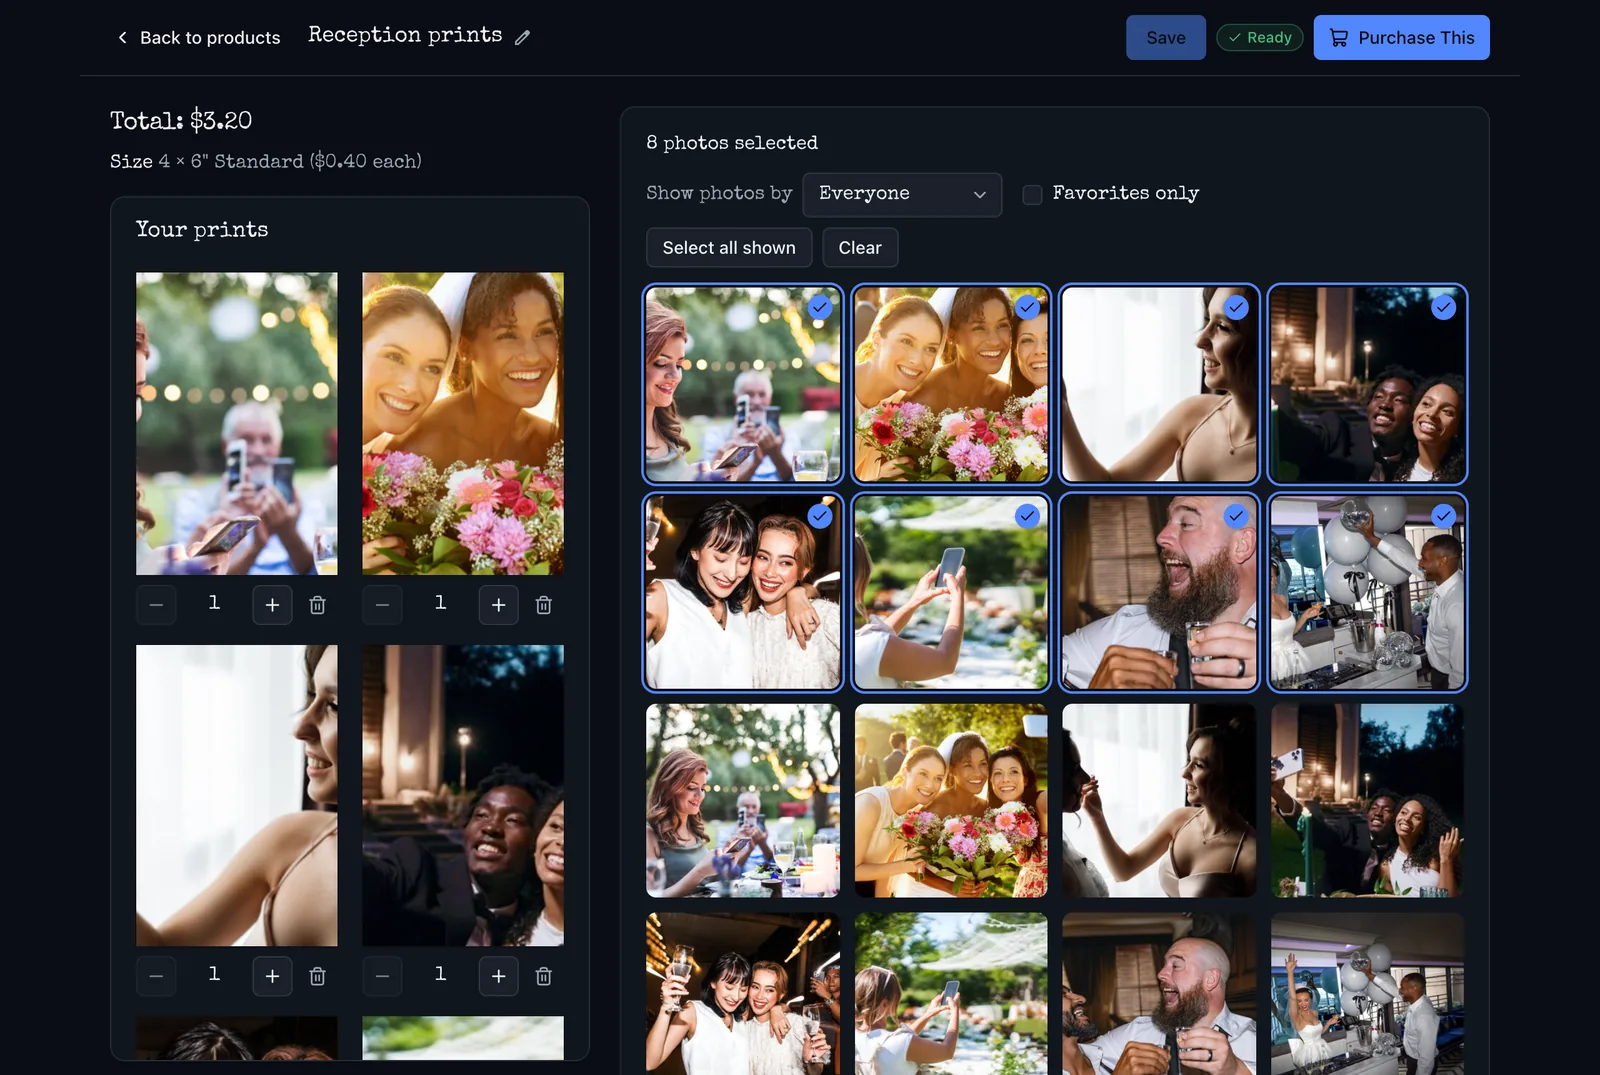
Photo book
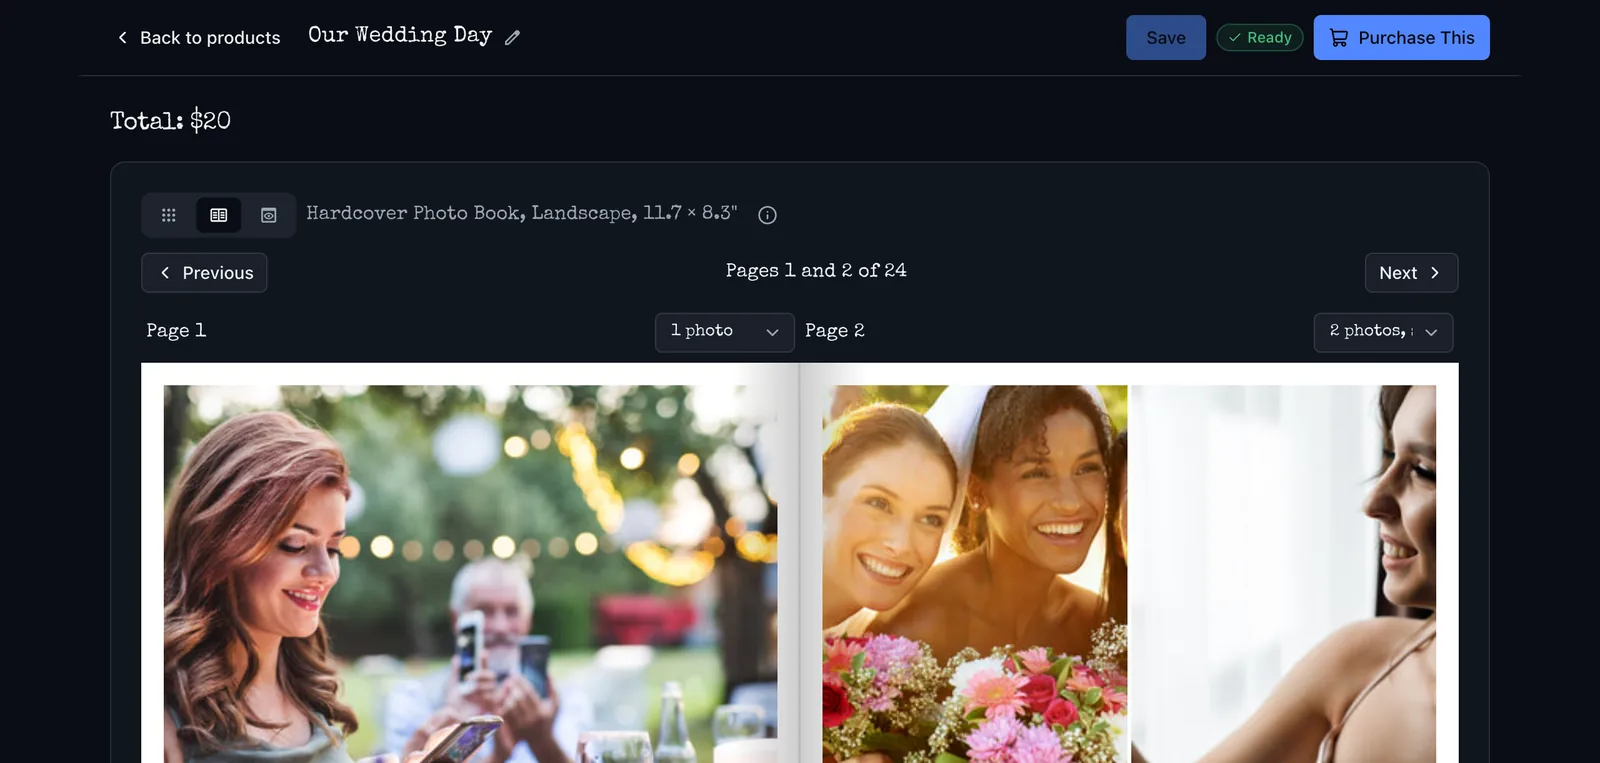
Pick a size and a softcover, hardcover or layflat binding. Then choose a cover photo and give the book a title. Lay out each page with 1, 2 or 4 photos, use Reposition to frame a photo, and Add caption for a short line under it (up to 24 characters).
Books start at 20 pages (softcover), 24 (hardcover) or 18 (layflat). Use Preview to flip through it like the real thing.
Cards
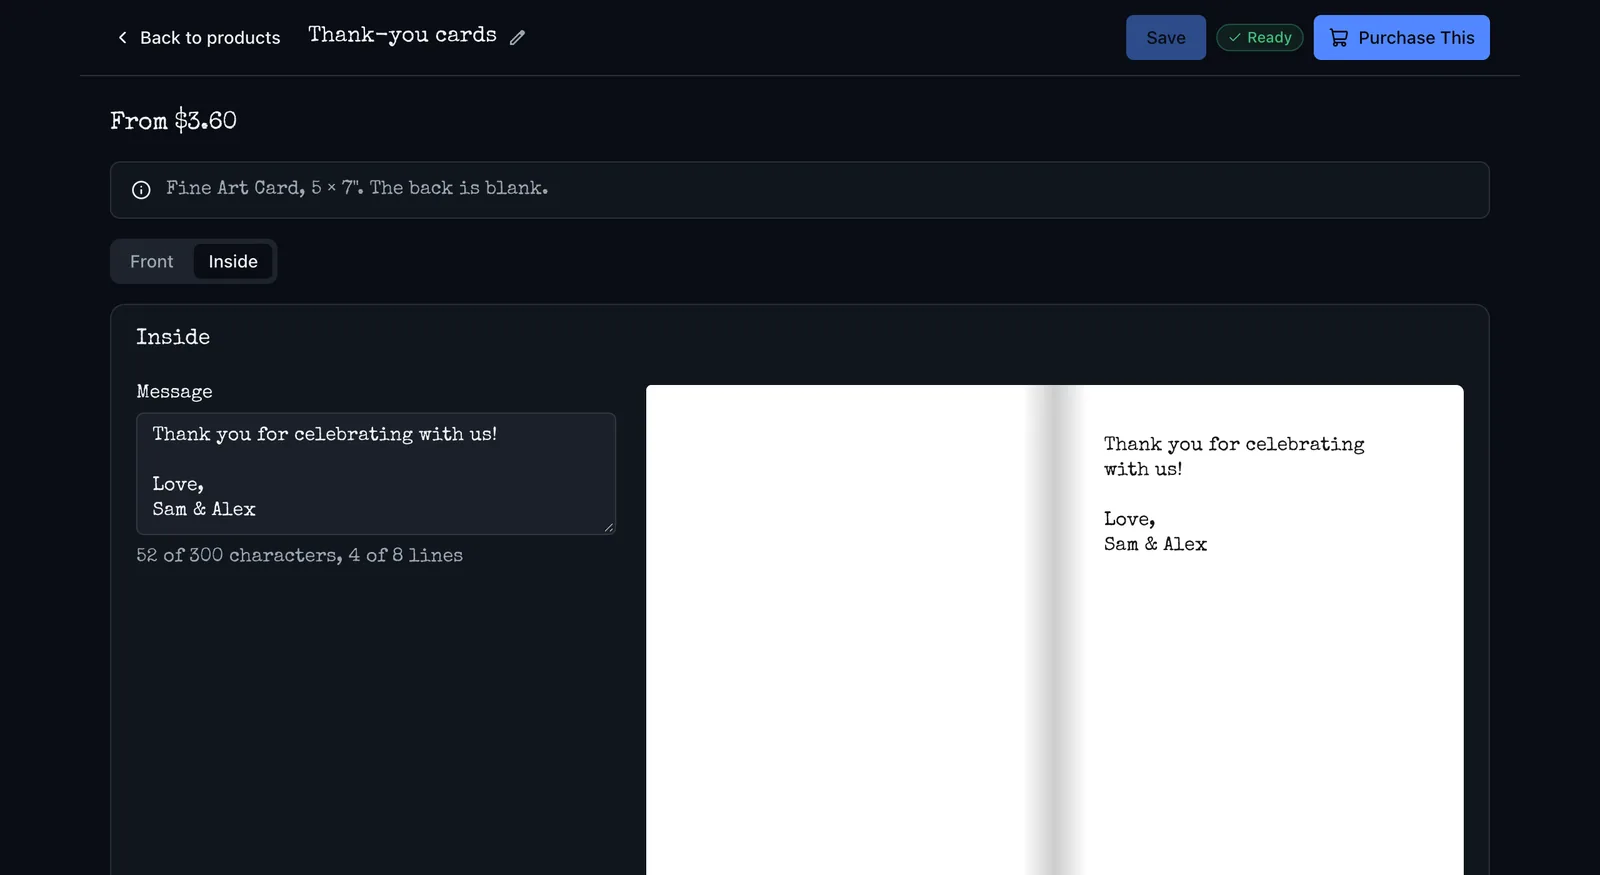
Fine art cards are good for thank-you notes. Choose the front photo, then switch to Inside and write your message (up to 300 characters). The back is blank. When you order, you choose a single card or a pack (10, 20 or 50, depending on the size).
When a book or card is done, press Finish. We prepare it for printing, and it shows Ready when it can be ordered or shared. If you change it later, press Finish again.
After the event
Share with your guests.
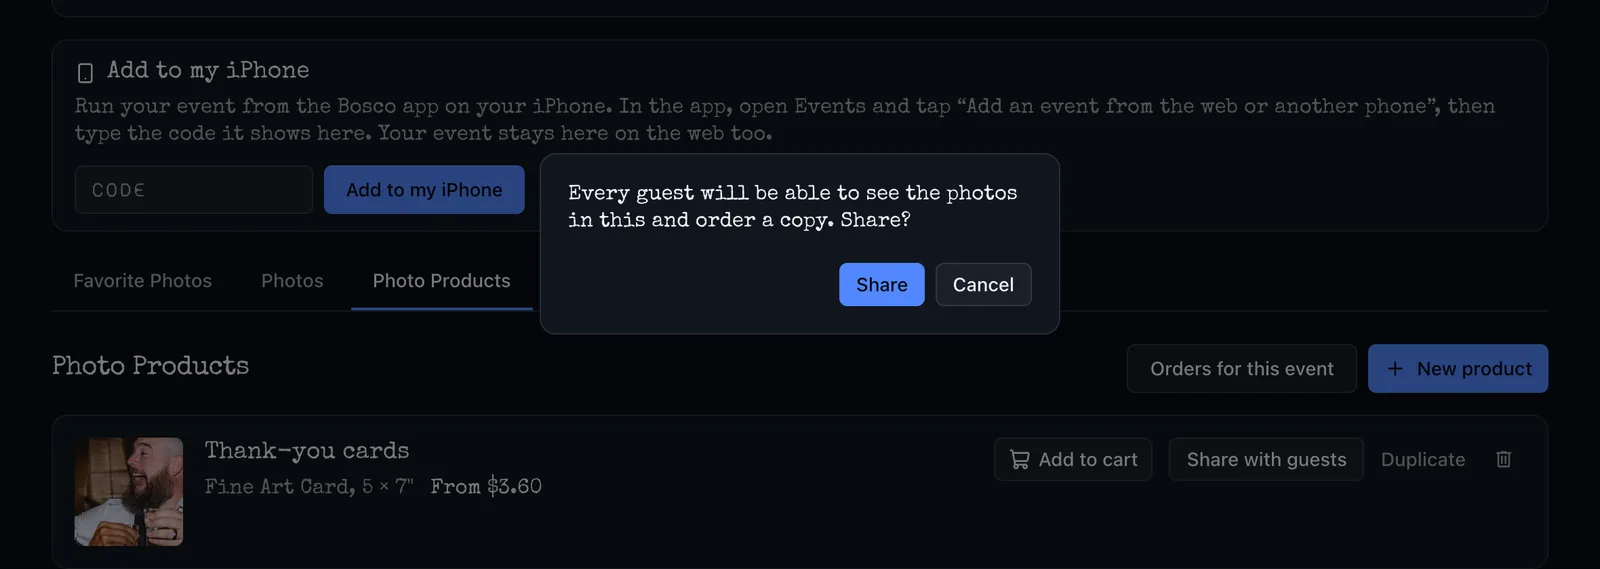
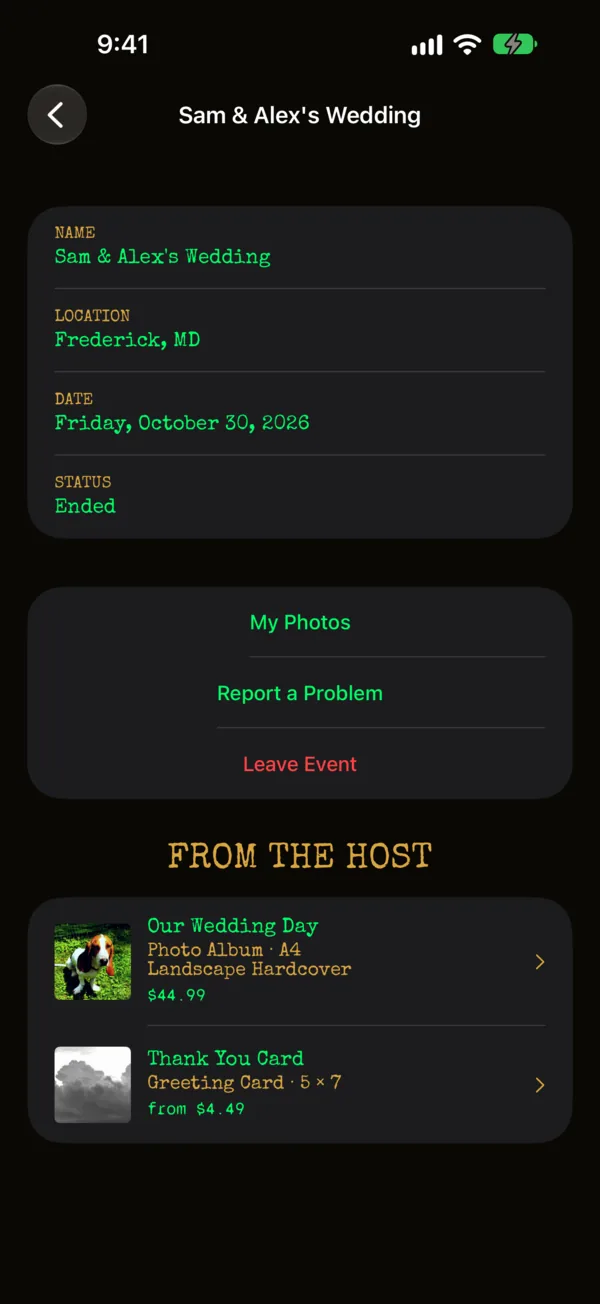
Once your event has ended, any product that's Ready can be shared. In Photo Products, choose Share with guests. Every guest then sees it in the Bosco app under From the host and can order their own copy, paid for by them.
Guests see the photos as watermarked previews, and their copy is printed without the watermark. Use Stop sharing at any time. If you edit a shared product, guests keep seeing the version you shared until you choose Update shared version.
After the event
Order.
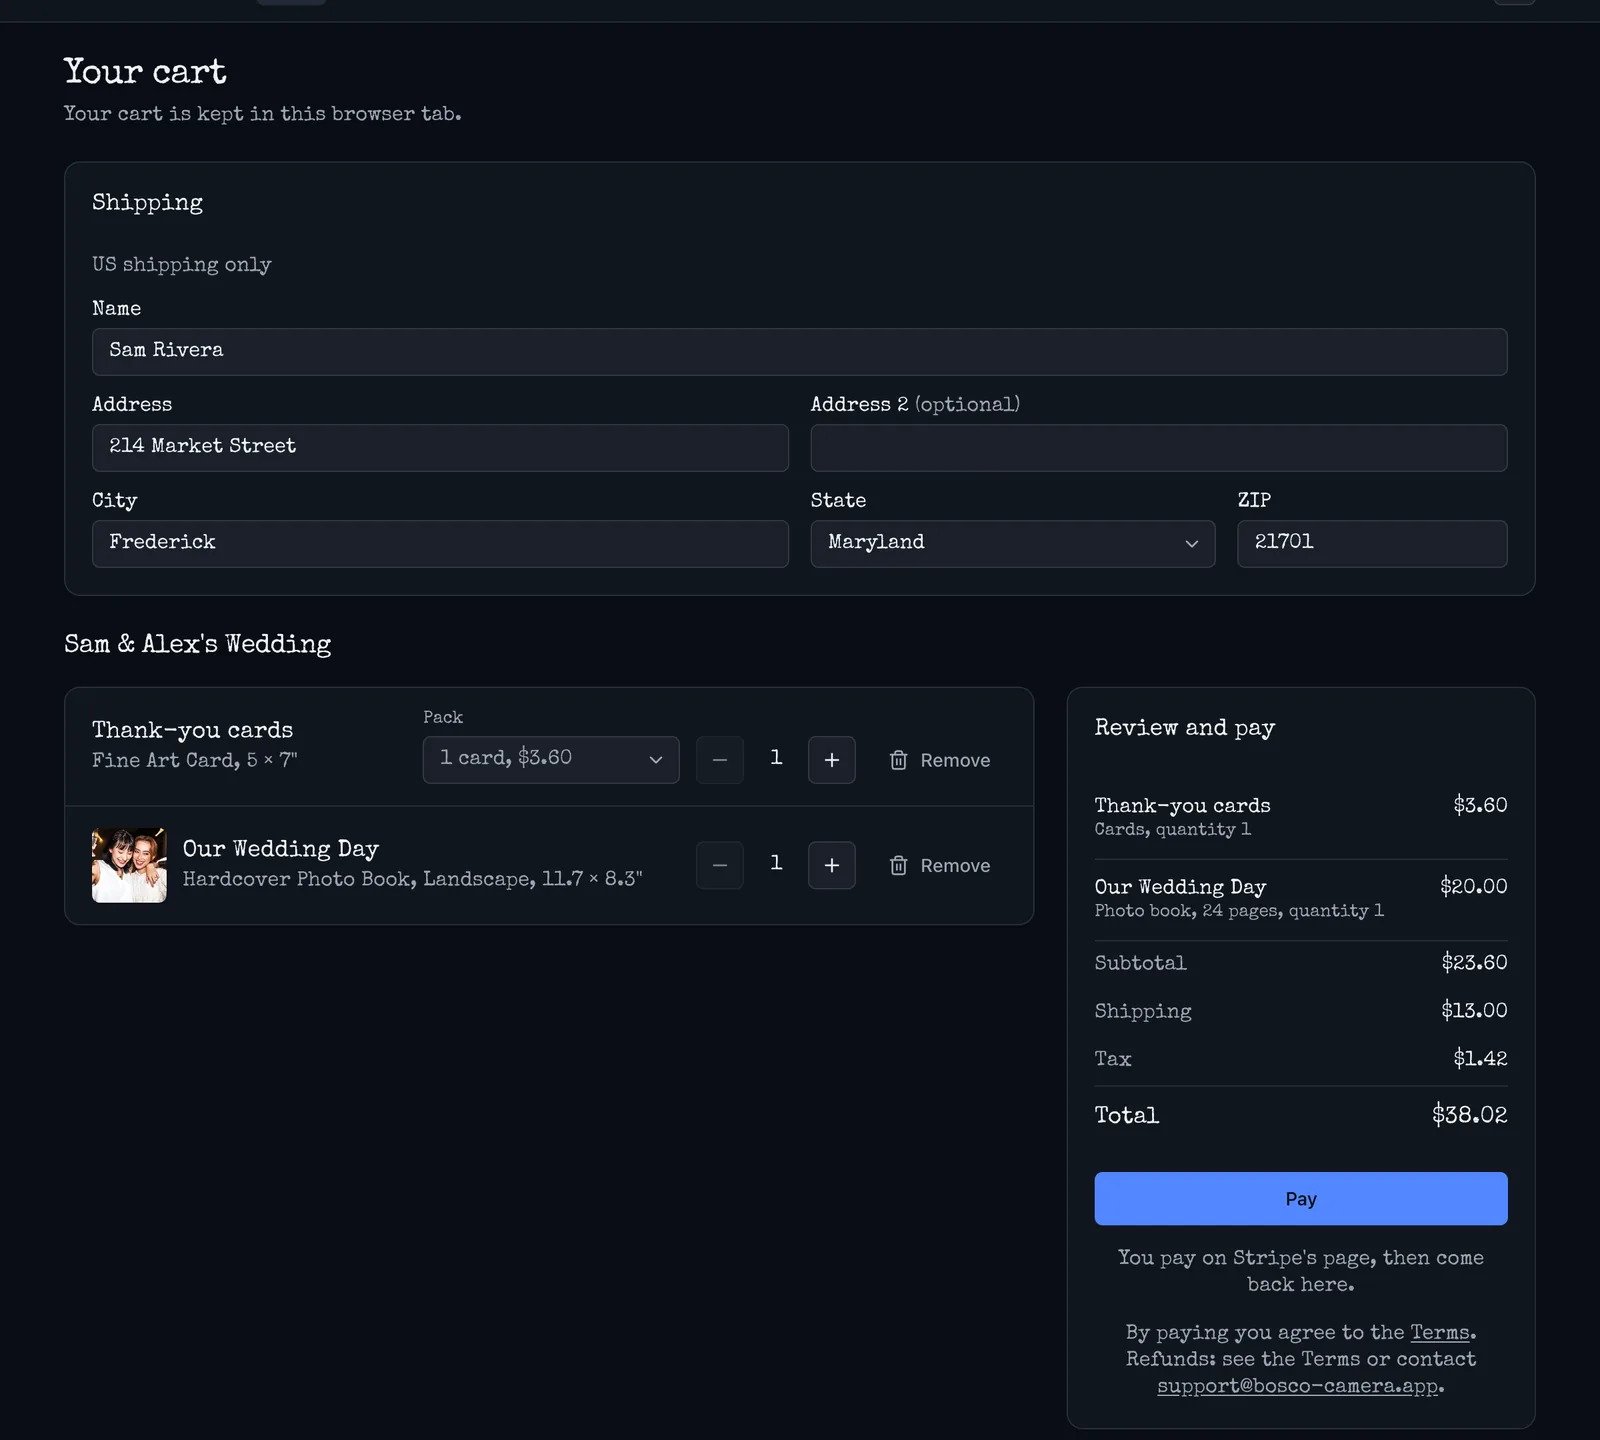
You can order once your event has ended. Choose Add to cart on a product, or Purchase This in the editor, then open Cart.
- Enter where it ships. We ship within the United States only.
- Pick a card pack and how many copies you want.
- Shipping is $10 for the first item and $3 for each one after. Sales tax is added where required.
- Press Pay and pay on Stripe's page.
Your cart is kept in that browser tab, so finish your order before you close it.
We check every order before it goes to the printer, and we email you when it's received and when it ships, with tracking. You can follow it under Orders for this event. If a photo in your order can't be printed, we'll ask you to change it.
See the price list for every size and product.
Good to know
Questions hosts ask.
Can I do everything from my phone?
Almost. The app is where you create the event, invite guests, print table cards, add co-organizers and order prints. Photo books and cards are designed on the web, where you also see the photos large, pick favorites and share products with guests.
I didn't get the sign-in email.
Check that you typed the address on your event, and look in your spam folder. In the app, the Web Access section on your event has Send Again for the "event is ready" email. If the address is wrong, tap Edit to change it and we'll email the new one.
My wedding is more than one day.
Create one event for each day, such as the rehearsal dinner, the wedding and the brunch. Each day is $49, because the fee pays for a real person on our team to support that day. Each day has its own guest code, so send guests every day's invite; they can join them all ahead of time. Photos and products are kept per day, so a photo book is made from one day's photos.
Can I download the photos?
No. Bosco is made for prints, so photos are seen in Bosco and ordered as prints, books and cards.
How long are the photos kept?
Until you delete them. We don't delete them on our own. To delete your events and every photo in them, use Delete my data under Account on the web, or Delete my account & data in the app.
A guest's photos shouldn't be in my event.
Use Remove this guest's photos, in the app's Proof Sheet or on the web. Our team also reviews every photo before it's printed. If something needs our attention, email us.
I got a new phone.
In the app, open Events and tap Add an event from the web or another phone. It shows a code; type it into Add to my iPhone on your event's web page, or email us and we'll help.
Still need help?
We're here for your event.
Before, during or after, write to us and a real person will get back to you.